Week 16 and I officially finished with my portion of the hip and valley mock-up. The hip rafter (left center) and the valley rafter (immediately to the right) were my area of focus. I started with the left side of the hip rafter, calculating the longest hip jack rafter and then moving down to the shortest hip jack. After those two were finished, I moved over to the right side, starting with the longest hip jack rafter on the bottom, and then moving onto the hip valley cripple. By working from the biggest member to the smallest, we were attempting to conserve material. If a mistake with a larger member was made, there would possibly be an opportunity to re-purpose it into a smaller member.
The line length of all rafter members are calculated using the run under the rafter, times the unit length. Achieving unit length is done by adding the rise squared times the common run squared (for a common rafter, e.g.: 8^2 + 12^2 = C^2), and finding the square root of the resulting number. For a hip or valley rafter, unit length is found in a similar fashion, only the run is determined as 16.97 in all mathematical calculations (17 on the framing square, due to the it's lack of precision.). The hip run is squared and added to the squared rise, as previously described.
After completing the hip/valley mock-up, I moved back to working on our shed. The soffits were completed, so we installed the facia over the rafter tails. There is a 1/4" reveal on the bottom.
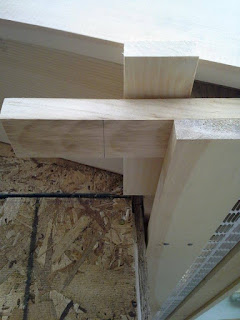
Here is a close-up of the rake facia and eave facia meeting. We allowed the rake facia to run long until all parts were in place, and then the excess was sawed off with a handsaw. This had to be done carefully, so as to not scratch, or scuff the facia. It is finished trim work, which will have minimal touch-ups.
Here we are getting ready to assemble the returns internal pieces. The pencil mark above indicates where the extended piece of the return will be ripped to.
All four pieces kreg drilled, pocket screws and glue standing by...
A piece of the return in place.
An above image of the kreg drilled piece.
The left side
After most of the return pieces were assembled, we started work on the drip edge. The pieces are aligned and cut by hand, the rake edge comes down over the eave edge, to allow water to run off.
The drip edge pinned in place.


Low A for this post (94). To raise this grade explain how you located the bottom of your hip/valley cripple on the valley rafter or describe how you determined the width of the inner soffit extension and why.
ReplyDelete